The BNAS series of products as well as certain DAS products use an AMT board (Automatic mirroring technology). The associated software is the JMicron HW RAID Manager. This software and the product functionality can be tricky. Here are a summary of the tips, with more detail and screen shots below:
- Don’t run multiple copies of raidmanager (causes confusion). The program doesn’t close as you might expect – it runs as a service.
- Don’t run zero copies of raidmanager (because no log files will be written).
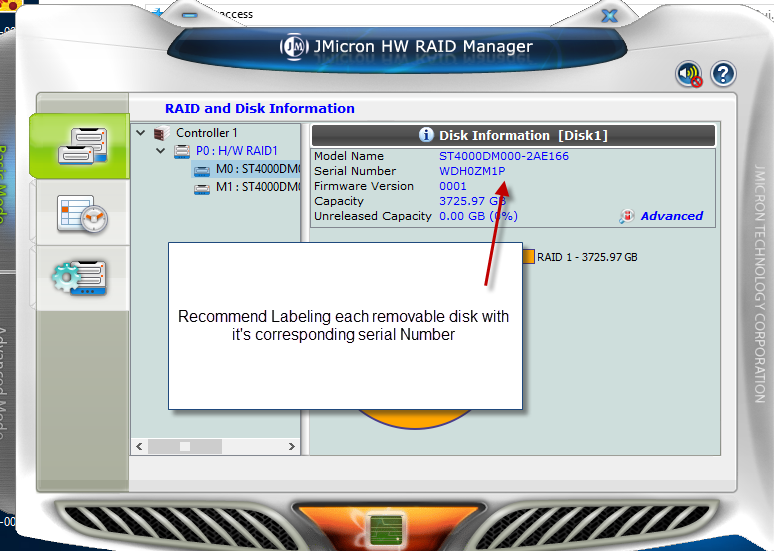
- We recommend physically labeling disks with a serial number to avoid confusion.
- Make sure you don’t accidentally have 2 or more raid pools (this leads to corruption)
- Delete corrupt raid drives from within raidmanager to remove the RAID Metadata hidden at end of the disk.
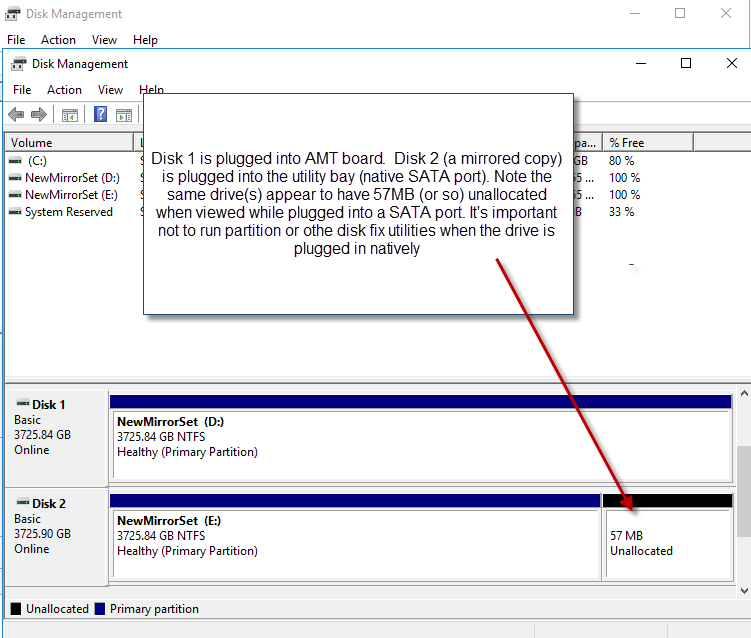
- Partitions look different when viewing from SATA versus AMT board so don’t try to “fix” it.
- If drives are not visible when plugged in as stand alone drives it indicates corruption. Re-create the mirror pool.
- HW RAIDManager usually launches as a service. Open it by clicking on the blue icon in the tool tray NOT by launching icon from the desktop. Launching it from the desktop will result in multiple copies running at once, which can be confusing. See figure 25.
- Make sure at least one copy of RAIDManager is running at all times or the logging function won’t work.
- We recommend you note the serial number displayed in RAIDManager of each drive and physically label the drives with the last 4 digits of the serial number. This will reduce confusion and aid in troubleshooting. Only the serial number shows in the log, not volume labels. See Figure 50.
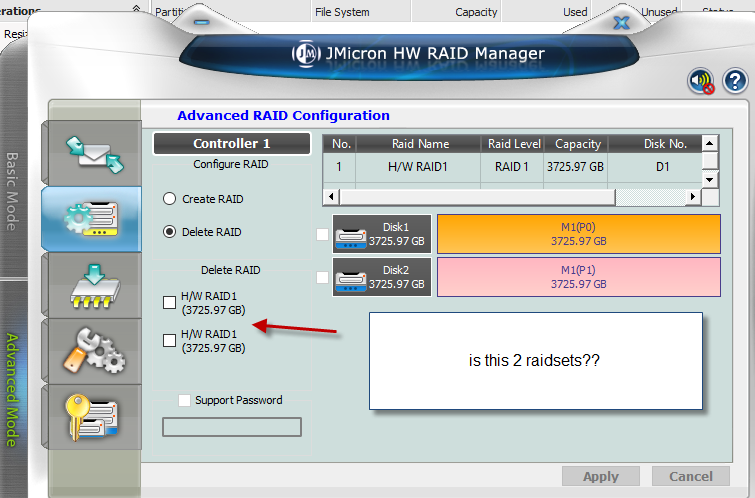
- Verify you only have ONE mirrored RAIDset pool created (a pool may have 2 or more drives as part of a rotation). If you look under advanced, click the “delete” radio button you may see 2 entries “H/W RAID1” this means you have two raidset pools. This may result in confusion and incorrect operation. See Figure 100. You can also see this if you look at the log and see 2 RAID IDs. See figure 101
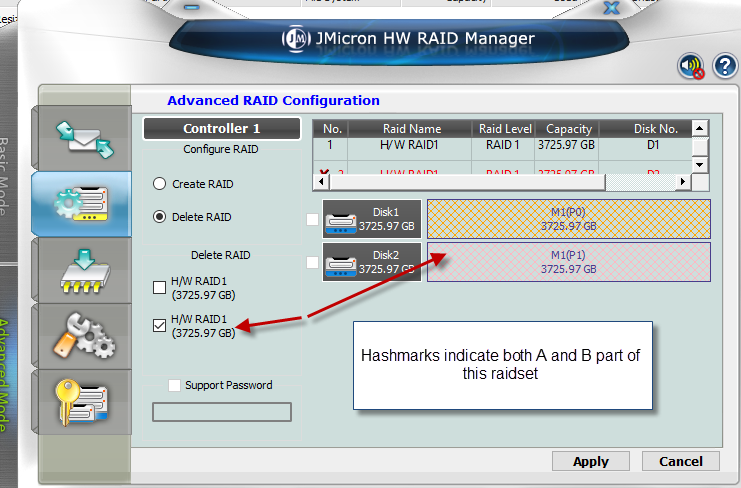
- To further illustrate the problem with 2 different RAIDpools, refer to figures 125 and 126. The hashmarks indicate which drive(s) are part of the raidset. Note the drive we refer to as “A” (M1) is part of both raid pools. This isn’t good! It may be necessary to delete both RAID pools and start over.
- When removing a raid pool, we recommend you do so from within the RAIDManager. We have found that other techniques such as using Windows Diskpart (where you select disk X and then CLEAN)
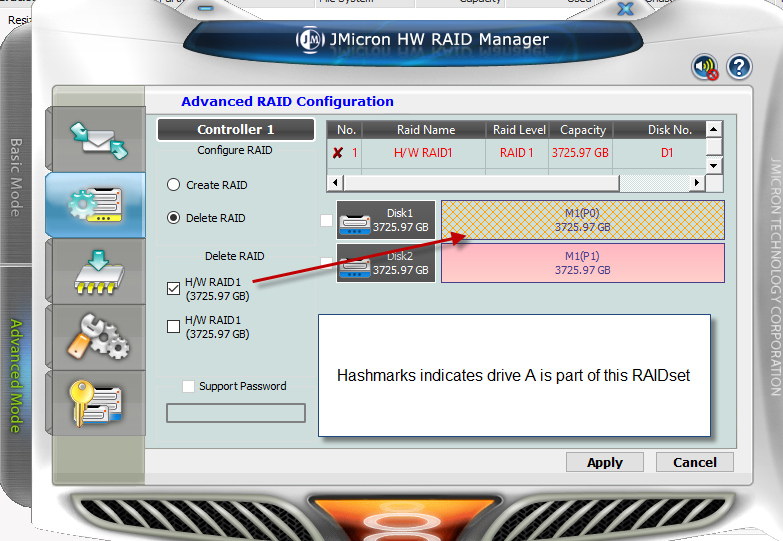
Figure 125
may NOT remove the RAID metadata. This is because when plugged into an AMT board the chip set “hides” the metadata from Windows.
-
Note in figure 130 the partition table looks different when the drive is plugged into a utility bay or stand alone SATA port. For this reason we recommend you don’t attempt to run disk fix utilities on the drive if it can’t be seen on a native SATA port without checking with our technical support department.
- After establishing a 2 drive mirror set, be aware that if you install a 3rd drive that doesn’t have a JWMicron RAID stamp, it will immediately be adopted into the mirror pool and will be overwritten! Do not insert unknown drives into the Mirror Bays. We recommend using the utility bay to view hard drives without danger of destroying the data on them.
- Normally drives written in the AMT bays will be readable anywhere else because they are standard NTFS format. Certain types of drive corruption can make drives readable in an AMT bay but not when installed in the utility bay. If this happens it may be necessary to re-establish a new mirror pool to correct the corruption.


