High-Rely’s DeltaSync is a feature designed as an alternative to RAID1 mirroring for very large hard drives. It should not be confused with the Microsoft protocol of the same name. DeltaSync is a high speed incremental copy from one drive to another. It can be set to copy (resynch) to create a “seed disk” or it can be set to kick off and re-sync when a drive is swapped. It can also be set to continuous (similar to the way our mirroring works) or even scheduled to happen daily at a certain time. When set to “continuous” the Netswap operating system monitors the file I/O on the master disk for changes and when a file is written to and closed it immediately writes a copy of the new or changed file to the destination. This is known as a true “Continuous Data Protection” (CDP) solution because updates happen based on any file I/O rather than based on a periodic schedule. If files were copied on a tight schedule, say every 15 minutes, that would be “near CDP”.
The reason DeltaSync was created was that re-mirroring large multi-terabyte drives can sometimes take longer than 24 hours. This is mainly a problem for 8TB drives and above. Block level re-mirroring on a Netswap with stand alone hard drives is typically 300-500 Gigabytes per hour. So an 8TB drive at 300GB/Hour might take 26.6 hours. Although RAIDPacs re mirror faster (about 2x the speed) they are also bigger so a 16TB RAIDPac will remirror in a similar time frame. By switching to a fast file synch only files that have changed since the drives were last synced are copied over, speeding the process considerably. DeltaSync does not use Rsync or any other copy program available under Linux. It uses low level file I/O to achieve copy speeds similar to mirroring. The performance of this copy is very fast. With any file based copy lots of small files will be slower than larger files but file transfer speeds approaching those of block level mirroring can be achieved.
Setting up DeltaSync – An Alternative to RAID1 Mirroring
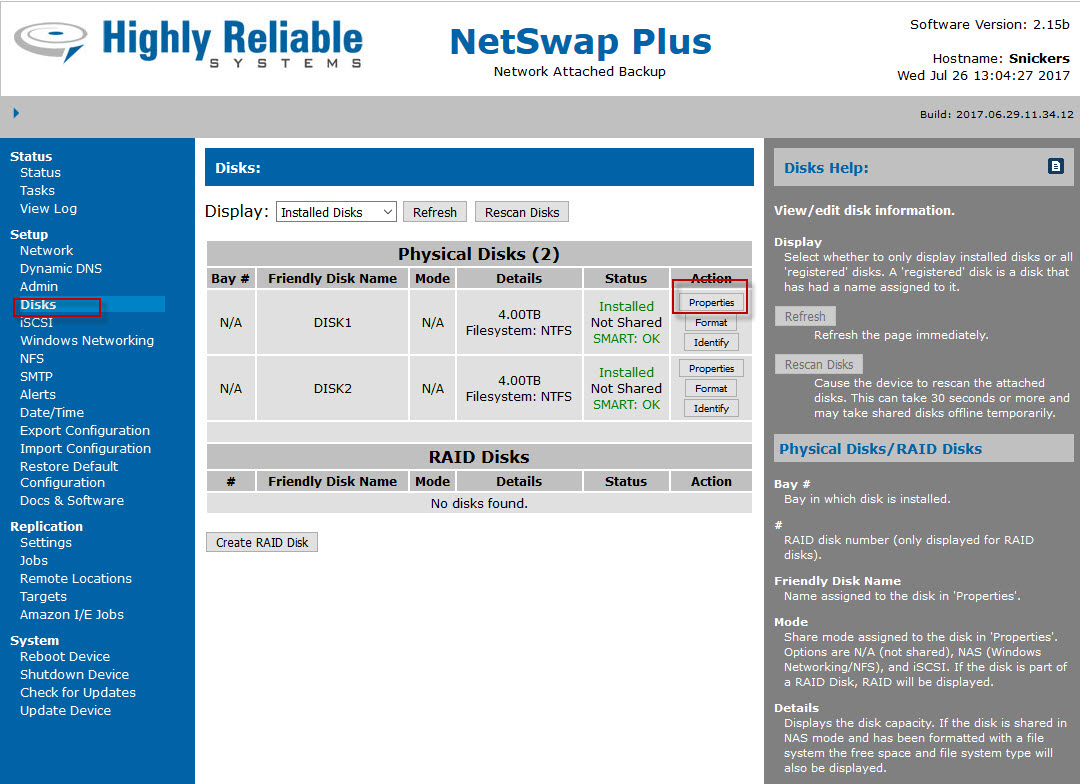
You will need at least 2 formatted drives to setup a DeltaSync. From the Disk menu select properties button on the drive you want to be the primary as shown in Figure 1.
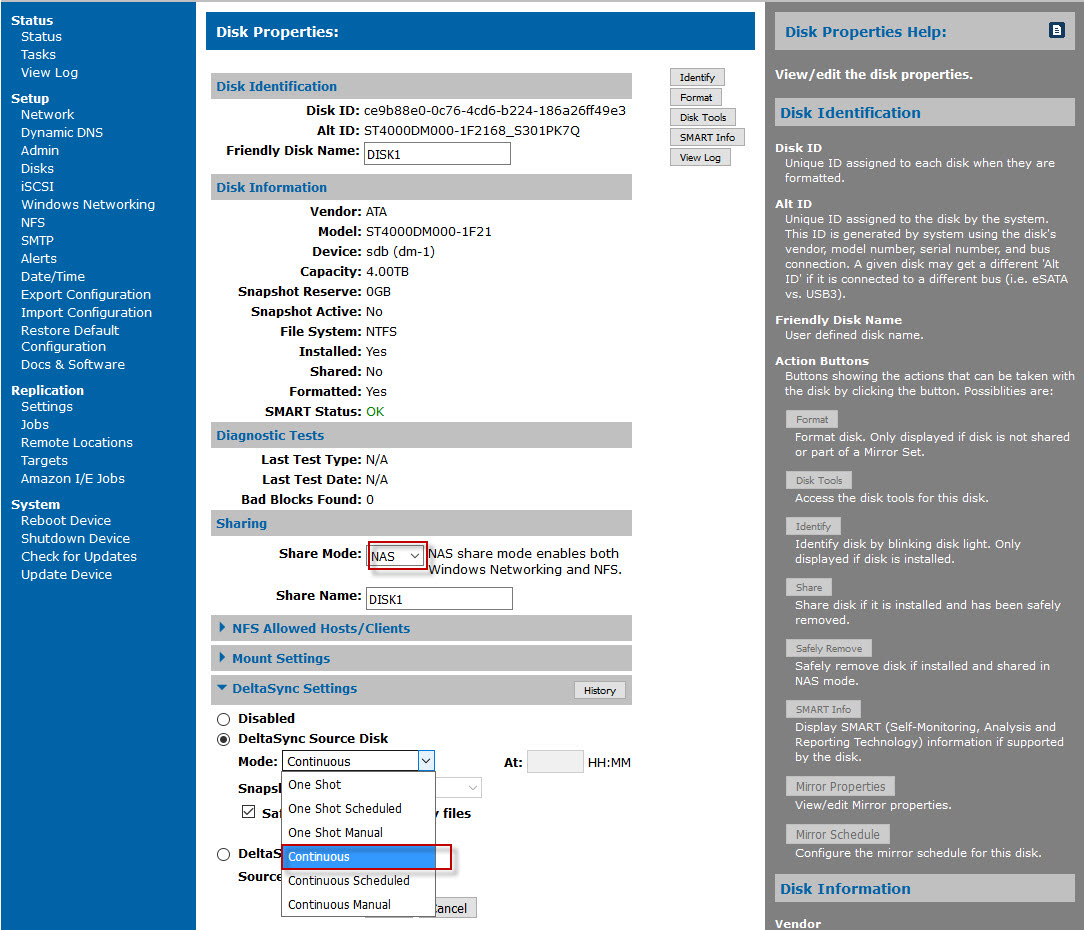
Figure 2 shows that DeltaSync drives must be shared in NAS mode (because when in iSCSI mode the disks are under the control of the iSCSI host machine and are unavailable to the Netswap OS). At the bottom of the disk properties screen you can drop down the DeltaSync Settings menu. You select this primary drive as the “source” of the DeltaSync data and choose between One Shot, One Shot Scheduled, One Shot Manual, Continuous, Continuous Scheduled, or Continuous Manual.
- One Shot – Run once and stop
- One Shot Scheduled – Start at a specified time
- One Shot Manual – Start when triggered by an Action URL or VBScript program (see Disk Tools).
- Continuous – Sync and then continuously keep disks in sync
- Continuous Scheduled – Start sync at specified time and then continuously keep disks in sync
- Continuous Manual – Start when triggered by an Action URL or VBScript program (see Disk Tools) and then keep disks in sync.
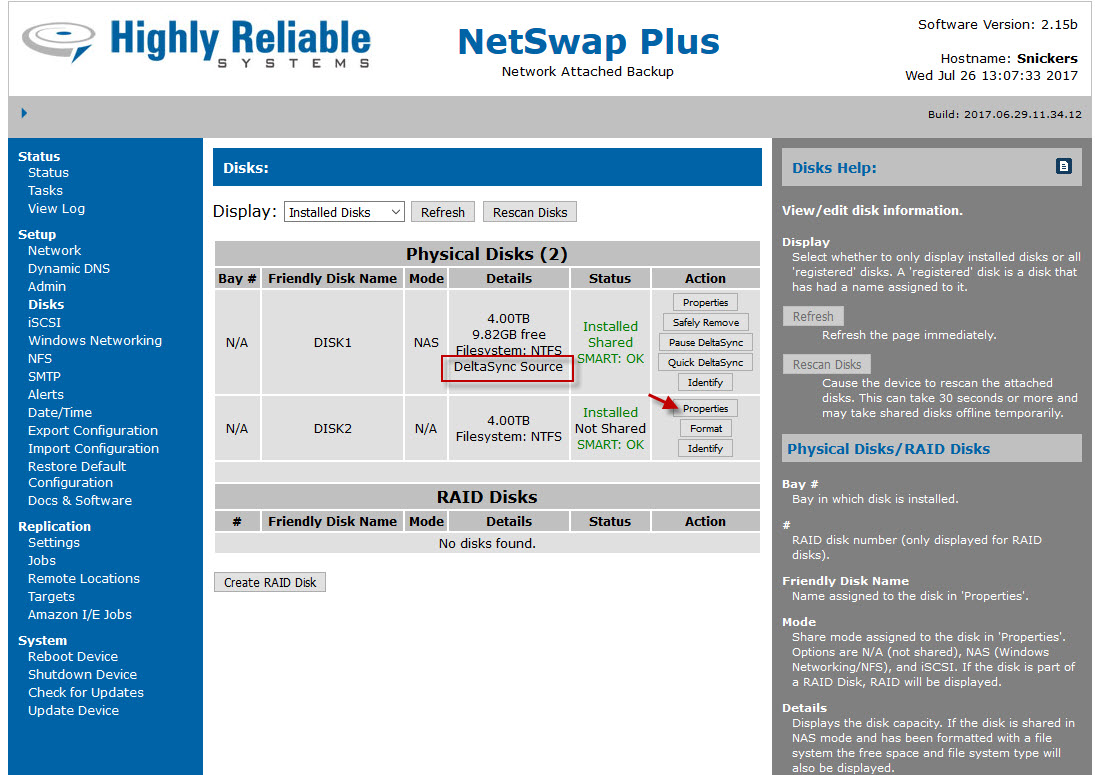
The most typical setting will be “Continuous”, as that mimics the behavior of a set of mirrored hard drives except replicating at the file level. In Continuous mode the file system watches for I/O and as soon as it sees a new file or change to a file and the file is closed, it immediately copies the file to the target disk. Once you select that Save and go back to the disks menu to see that the primary disk is now showing status of “DeltaSync Source” as shown in Figure 3.
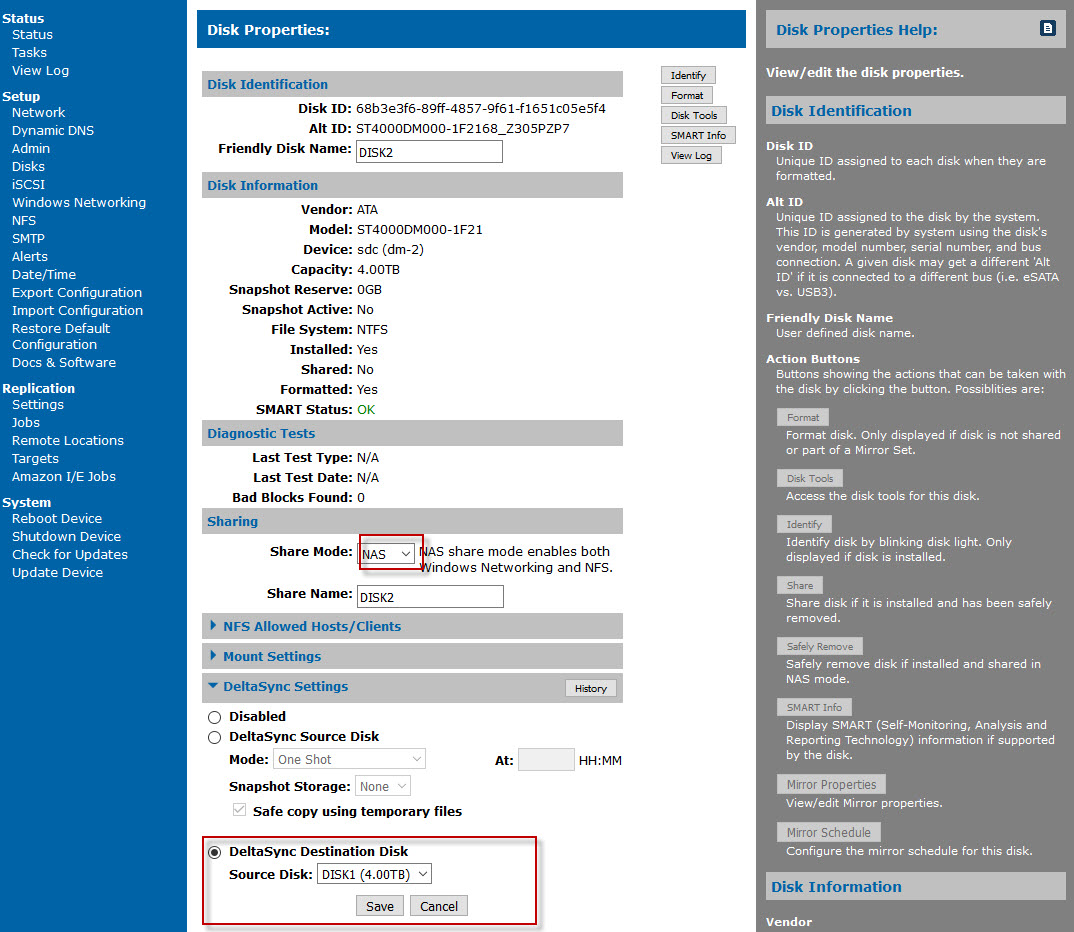
Now Choose Properties button on the second disk to set it up as a target as shown in Figure 4. Figure 5 shows the disk status after saving. Note that Disk 2 indicates it is a DeltaSync Destination for Disk1. You should be able to prove the Deltasync is working by copying files to disk 1 using it’s UNC path. All files copied should almost immediately show up on Disk 2. Note that files deleted on disk 1 will similarly be deleted on disk 2 when setup in continuous mode.


