Scheduled Mirroring and Ransomware
Scheduled Mirroring is a feature that is unique to Netswap backup appliances. It is intended to allow the user to periodically mirror a drive to create an “air gap” without physically having to pull a drive and put it on a shelf. In many ways, this is better than a real time mirror. The real time mirror works well for protection against hard drive failures. Delayed or Scheduled mirroring covers an even more common scenario: of ransomware or other corruption that can creep into the backup (and a real time mirror) before it is discovered. By having a copy of data from 1 week or several days ago, the enterprise protects themselves against fast moving Cryptolocker type ransomware or other new “zero day” viruses.
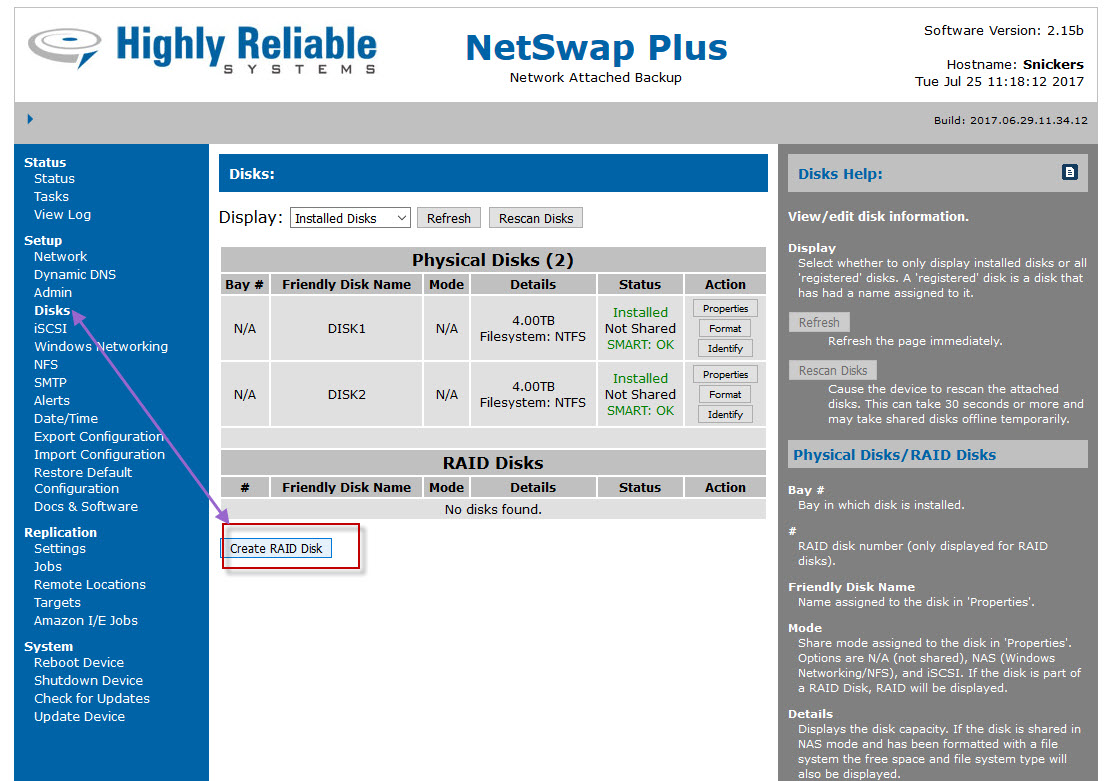
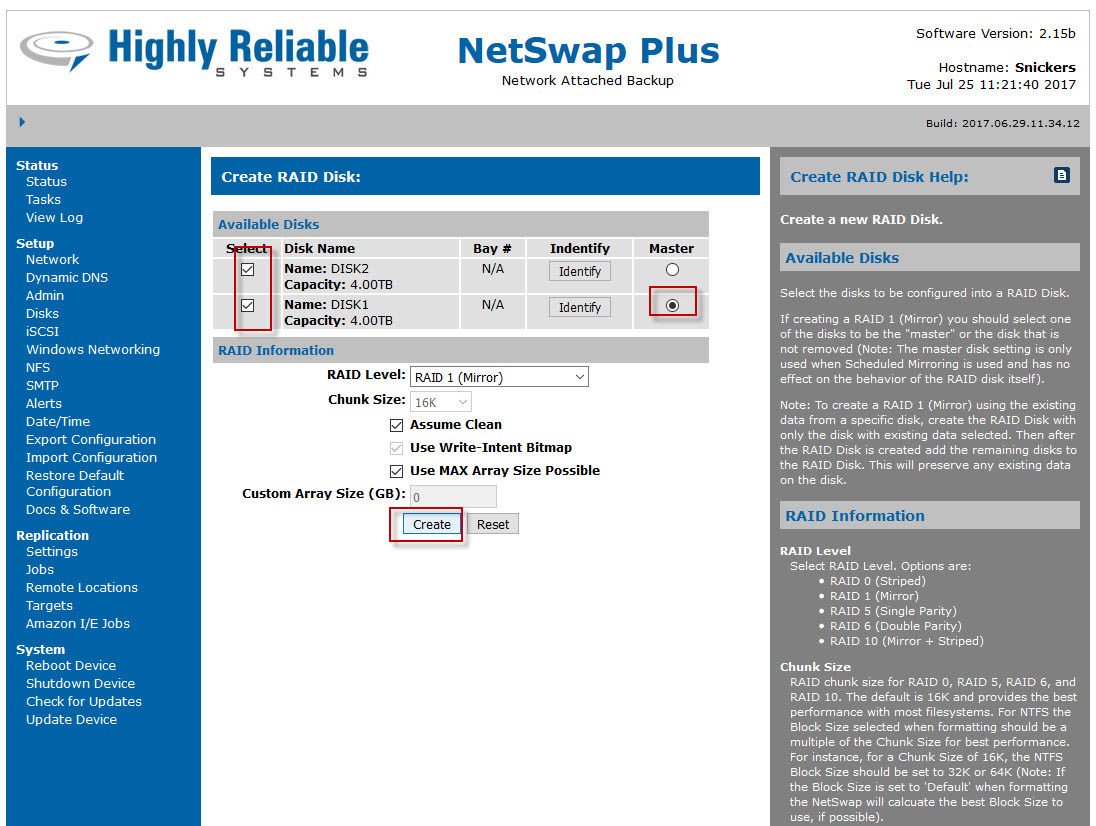
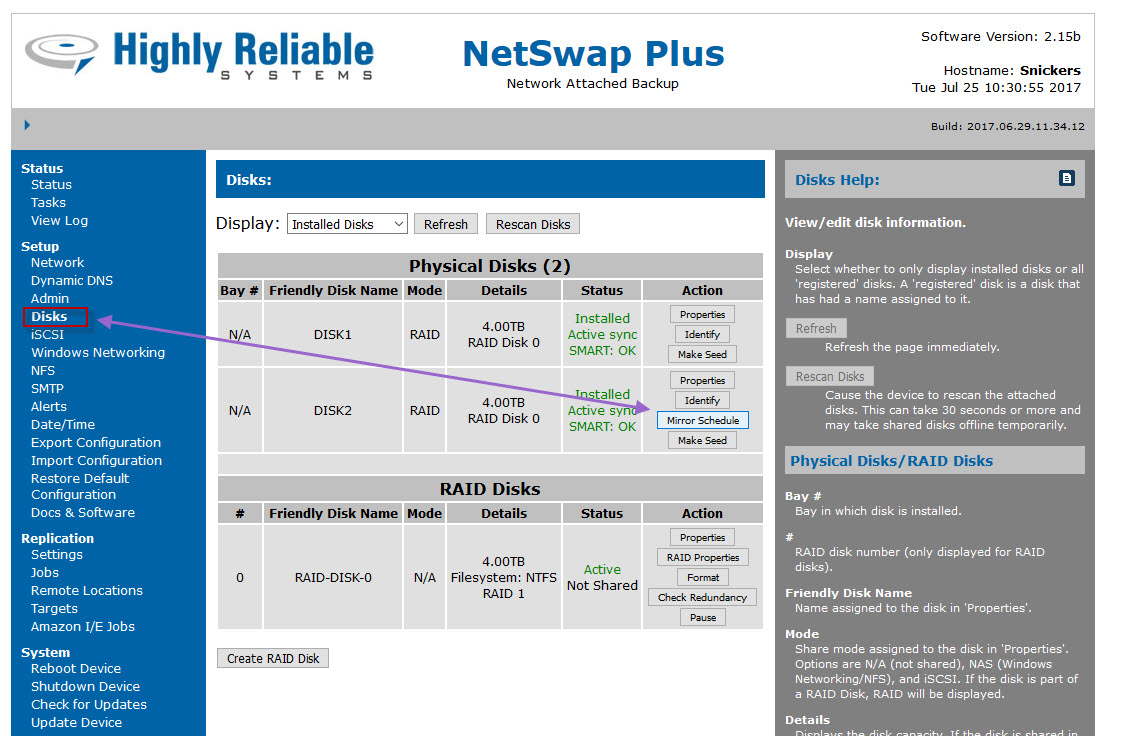
To setup scheduled mirroring you first need 2 hard drives. Simply selected the “Disks” Menu along the side of the interface to get started with all these options. We previously formatted two 4TB drives. As shown in Figure 1. Figure 3 shows you won’t get the “mirror schedule” button until you create a RAID 1 set. In figure 2 we have clicked the “Create RAID Disk button, chosen the 2 drives, and selected drive 1 to be our master.
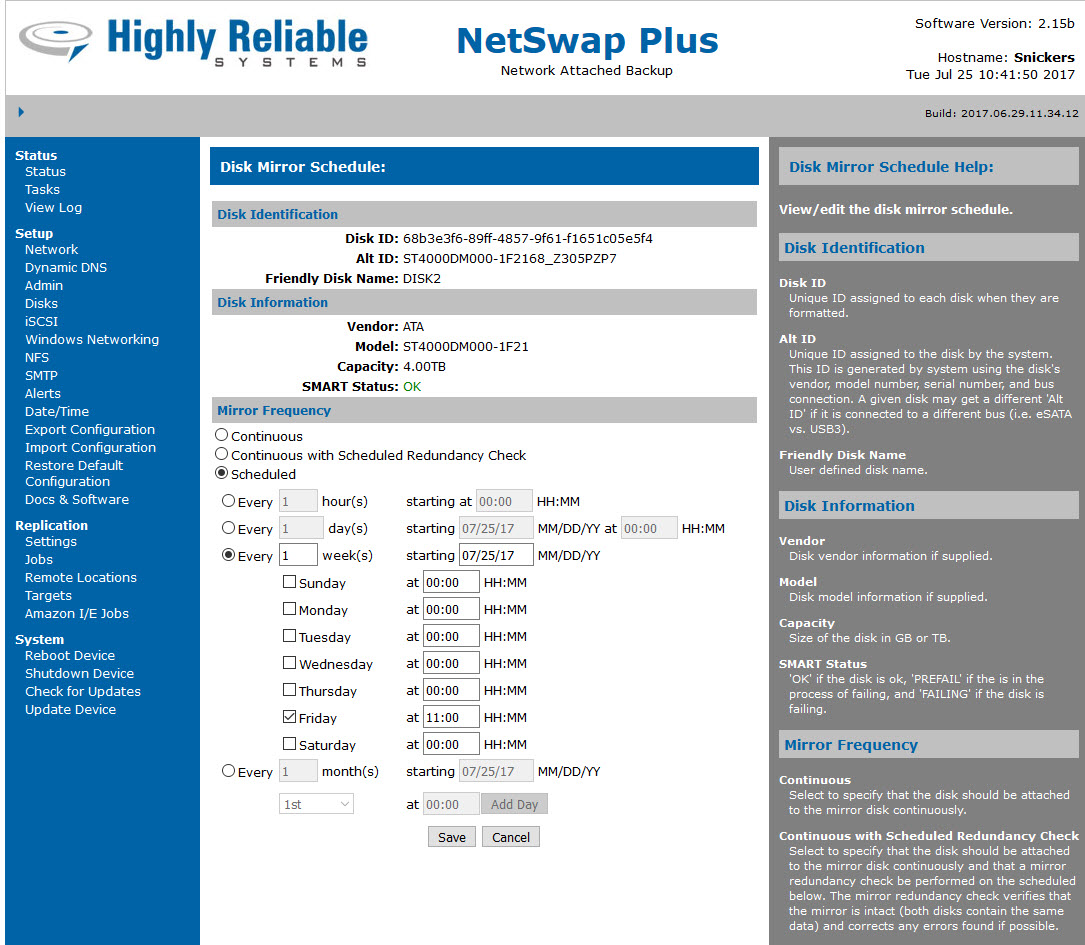
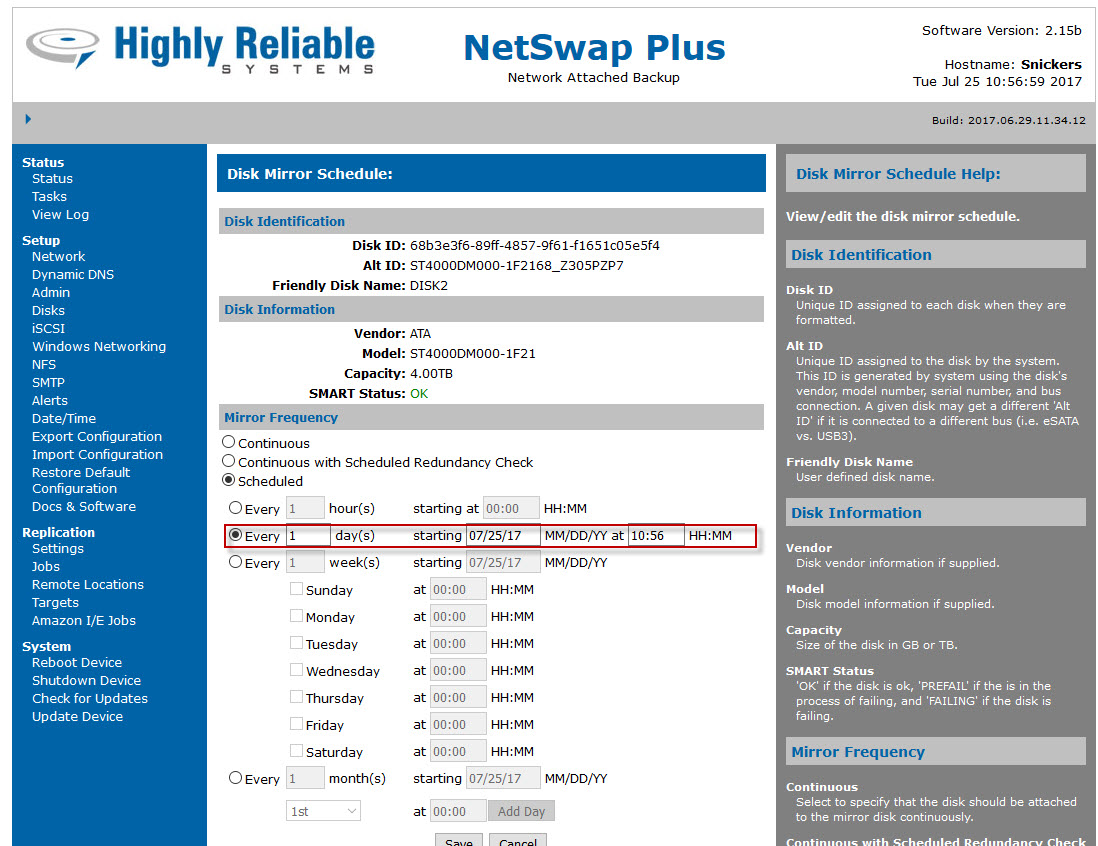
Now choose the “Mirror Schedule” button that will appear next to one of the two hard drives. The “Disk Mirror Schedule” menu pops up that will allow you specify how frequently you want to schedule the mirror as shown in Figure 4.
Since block level mirroring proceeds at 150-400 Gigabytes per hour make sure you allow enough time for a mirror to complete before removing media. For example, re-mirroring 4TB drives takes around 10 hours. We think once per week is a good period to have a point in time snapshot so in this example we’ve chosen Friday at 11pm. However, if you’d like to you can re-mirror every night. To test scheduled mirroring you might try to set the time for 2 minutes forward from the existing time, and tell it to go every day as we’ve done in figure 5.
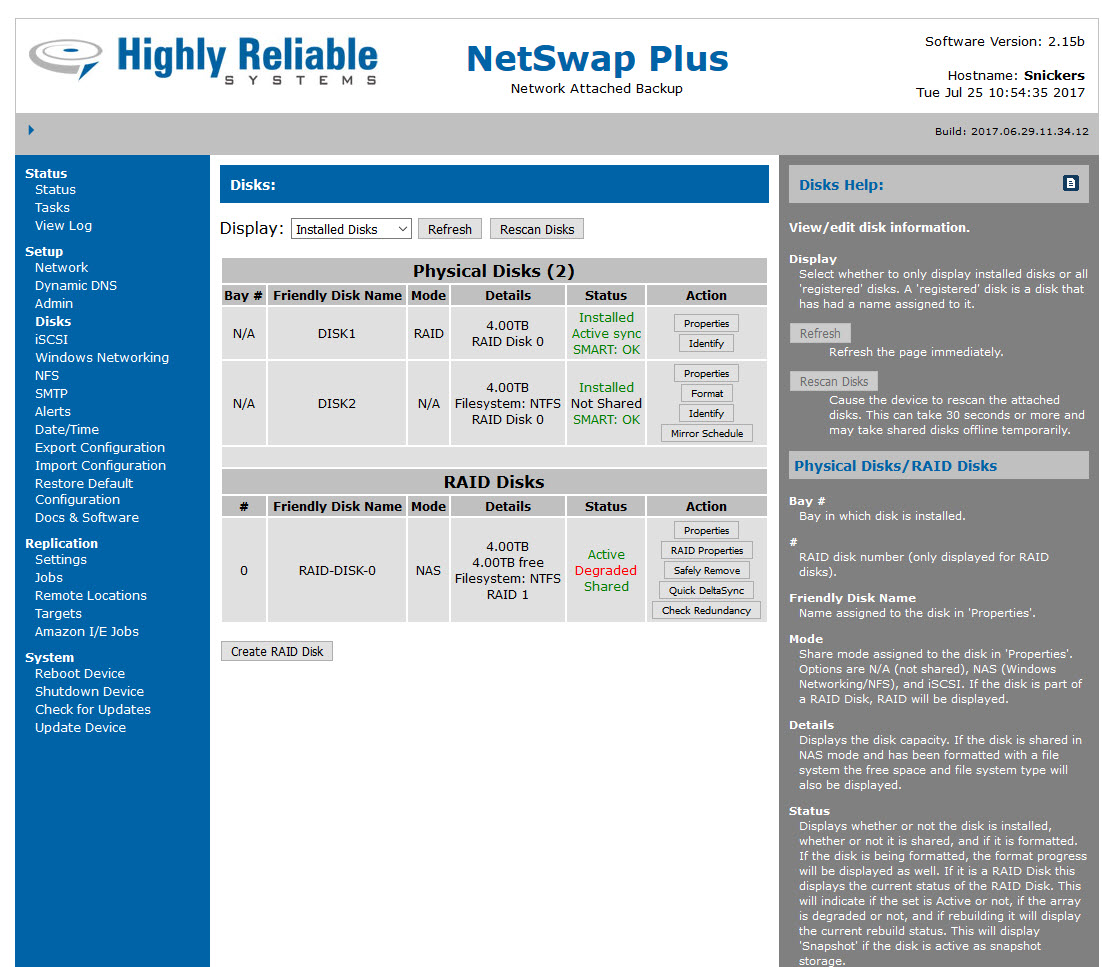
Notice in Figure 6 that after we set the scheduled time the main menu will show the mirror as “degraded”. This is because, in theory it always will be degraded with scheduled mirroring except during the period of time it’s actually rebuilding the mirror, when the status will be rebuilding.
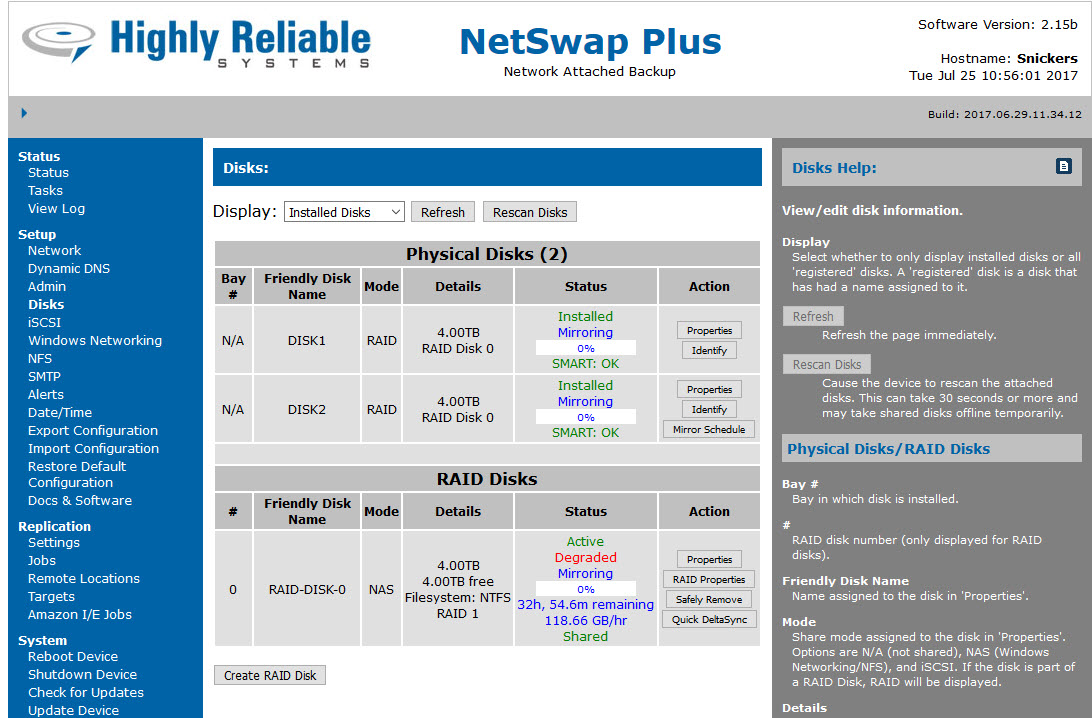
Figure 7 Shows that when we wait for the scheduled time, the Netswap kicks off a re-mirroring job.
Here are some of the schedule options available to you:
Mirror Frequency
Continuous
Select to specify that the disk should be attached to the mirror disk continuously.
Continuous with Scheduled Redundancy Check
Select to specify that the disk should be attached to the mirror disk continuously and that a mirror redundancy check be performed on the scheduled below. The mirror redundancy check verifies that the mirror is intact (both disks contain the same data) and corrects any errors found if possible.
Scheduled
Select to specify that the disk should be mirrored on the schedule specified below.
Every <n> hour(s)
Select to schedule the disk to be mirrored every <n> hours starting at a specific time. For example, every 3 hours starting at 09:00 am.
Every <n> day(s)
Select to schedule the disk to be mirrored every <n> days starting at a specific date and time. For example, every 2 days starting on 07/16/12 at 17:15.
Every <n> week(s)
Select to schedule the disk to be mirrored every <n> weeks on specific days of the week at specific times starting on specific date. For example, every 1 week on Monday at 06:00, Wednesday at 06:00, and Friday at 19:00 starting on 07/16/12.
Every <n> month(s)
Select to schedule the disk to be mirrored every <n> months on specific days of the month at specific times starting on a specific date. For example, every 1 month on the 1st and 15th at 06:00 starting on 07/16/12.
Note that it is normal for a scheduled mirror set to always be in “degraded” set. Check the History to view the log that shows that the mirroring is happening per your schedule. The mirror set will be broken as soon as the mirror completes and return to degraded status. This is the normal operation.


